In e-Quip for list reports we use either Microsoft Excel or PDF. These can both be generated from any summary screen. For data sheets we use Microsoft Word. A data sheet report is a “one report per item” type of report. Perhaps the most common example would be a job sheet. e-Quip ships with a number of sample Word reports. These samples can be used to create your own reports.
Let’s start off with a simple example of a job sheet – so simple in fact that it will just contain “Hello from xxx” (where xxx will be the Job No). This is about as simple as it gets.
Step 1: Create a new Microsoft Word document. Normally you would do this on a server that everyone can see. For convenience I’ll do this on my C: drive (this would be a really bad idea in practice because no-one else would be able to see it apart from me!). So, I have created a Word Document on my desktop called “Sample Job Sheet.docx”.
Step 2: I now need to create a new job report in e-Quip. Go to the job screen and click on the Reports icon. It doesn’t matter whether you do this from the summary screen or the job property page. This will show all of the available reports.
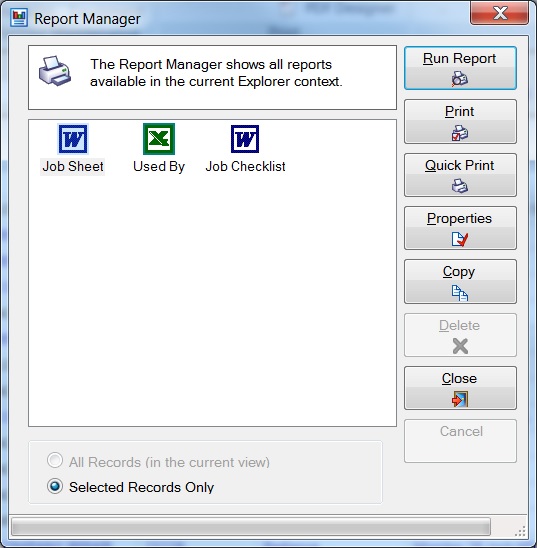
Step 3: Select any one of the Word reports and click Copy
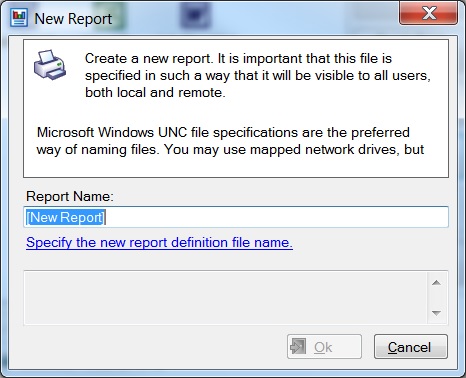
Step 4: Type in a name for the report. I’ll call mine “My New Report”
Step 5: Click the blue hyperlink “Specify the new report definition file name” and browse to the Word document you have just created. In my case this would be C:\Users\Graham\Desktop\Sample Job Sheet.docx. Then click Ok to create the new report.
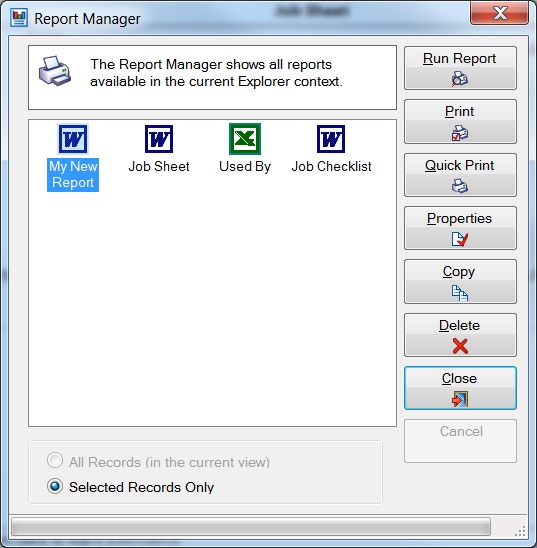
Now that we have a new report we can run it. If you have been working from the job property page then you can run the report straight away. If you’ve been working from the summary screen you will need to make sure that you have selected at least one job in the summary screen before you run the Report Manager. Let’s suppose you are on the job property page. All you need to do is click the icon for your new report then click Run Report.
So far so good, but an empty report is not much use to anyone. We need to put some content into the report. e-Quip allows you to lay out your report using Word and to insert content from the database wherever you like using mail-merge tags. Note that e-Quip doesn’t actually use Office mail-merge, it just uses the tags as a convenient way of marking database items. So lets define the report.
Step 1: Open the Word document
Step 2: Type “Hello From ” anywhere you like in the document.
Step 3: Leave a space after the word “From” and then add a Word merge field. How you do this depends on the version of Microsoft Office that you are using.
If you are using Office 2007 or later then click on The Insert tab and then the Quick Parts icon. From the menu that appears choose Field and the following screen will be displayed.
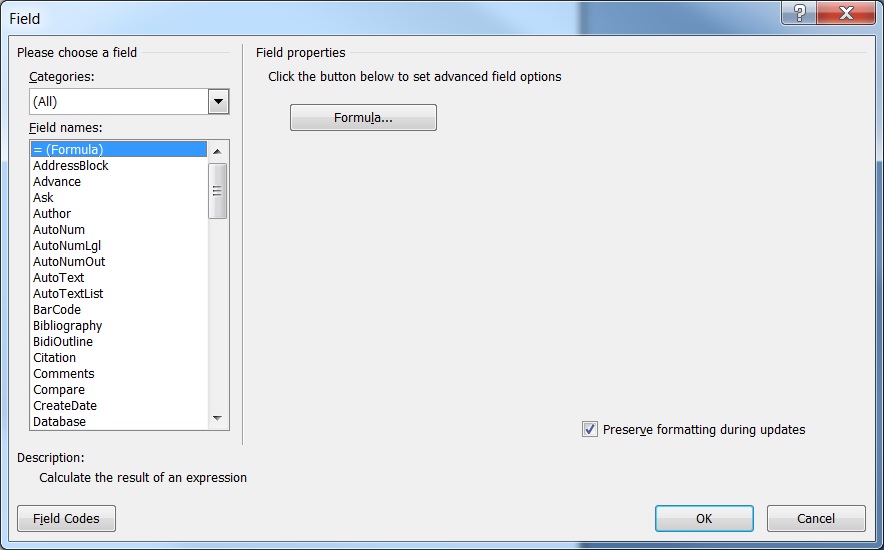
If you are using Word 97-2003 then just select Insert -> Field. The same form will appear.
Step 4: In the Field names list select MergeField. Then in the Field name box type in “JobCode” (exactly as it appears)
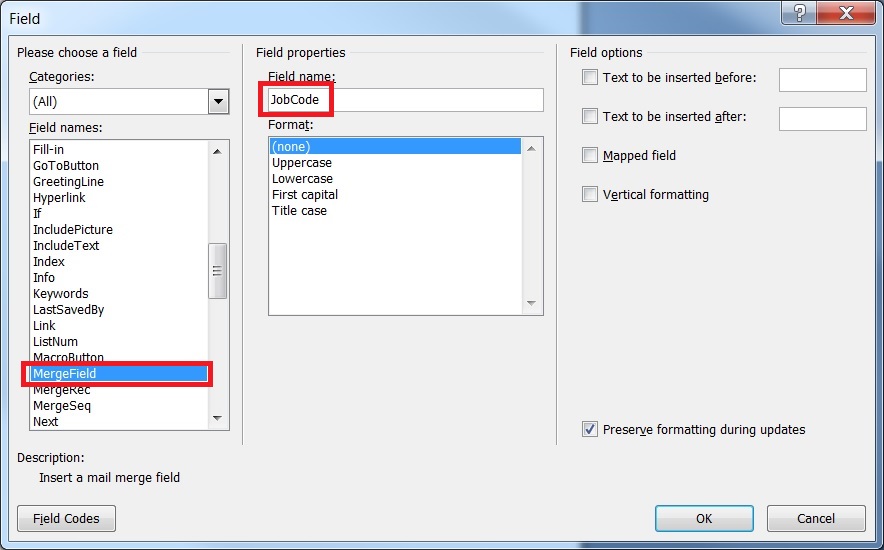
The click Ok.
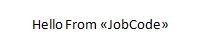
Step 5: Your document should now look like this:
Now run the report again. If you’ve done everything right then your new report should be displayed.
How do you know what to type in the merge field names? That’s why there’s a standard report provided with e-Quip. You can just copy & paste from the sample into your own report. In the next example (coming soon) I’ll show you how to do something a bit more complex: a list within a data sheet