Loan deliveries and collections were introduced to support very busy libraries as a way of issuing & returning loans in bulk. There is a blog article about deliveries & collections here. This was a significant step in reducing the amount of paperwork shuffled by libraries, but it was only a first step. As equipment is delivered to and collected from around the hospital, library staff commonly carry both paper delivery and collection lists to record delivery & collection times, who equipment was given to etc. On returning to the library these paper lists could then be transcribed to e-Quip delivery & collection lists to open or close loans in bulk. Although the process had been simplified it still required paper.
Our new PDA application for loan deliveries & collections means that you can get rid of those paper lists.
Just like our existing PDA application (read about e-Quip for PDA here) this application uses a synchronisation mechanism in which data is copied from the central database to the PDA while it is docked in its cradle. The device can then be used on the move with no need for network connectivity. On returning to the library the device can be docked and the central database is synchronised with the data on the PDA. This process is called check-out and check-in.
Check-Out
The purpose of the check-out is to extract data from your e-Quip database and to copy part of it to a mobile database that can be copied to your mobile device. The first step is to specify where the compact database file to be used is. It’s normally in your e-Quip Install folder called eQuip.sdf.
Once you’ve selected the database file the necessary data is copied. The data copied is:
1. Equipment: All library devices
2. Models, Brands & Categories: Only for undelivered devices which are currently open delivery lists
3. Locations: All locations with the “Synch with PDA” flag set.
4. Personnel: All personnel records with a type class of Library Staff
5. Loan Delivery List Items: All undelivered line items from all open delivery lists
As soon as the data has been copied the compact database file is copied to your PDA using Active Sync or the Windows Mobile Device Centre (depending on your version of Windows).
Note that this will overwrite any existing database file on the PDA, so make sure that you check-in first if you have been using the device.
Using the PDA Application
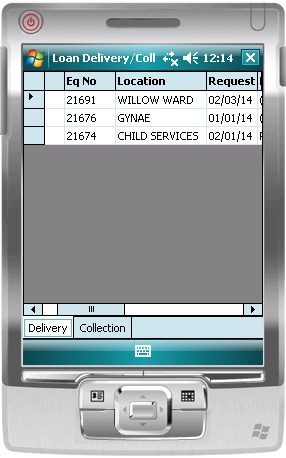
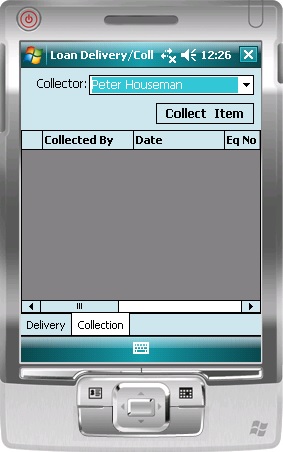
The application main screen shows a tabbed dialogue box with two tabs: deliveries and collections. The deliveries list shows all items that were checked out and which are awaiting delivery. The collections list is empty. This list is created as you collect equipment.
Making a Delivery
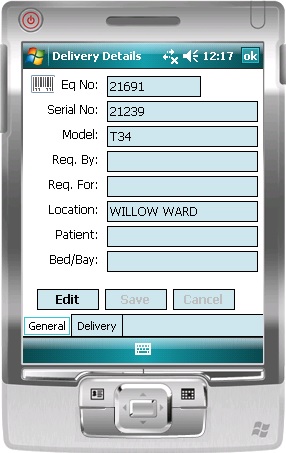
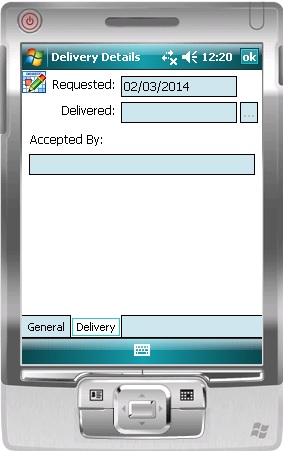
The deliveries tab shows all outstanding deliveries for all In Progress loan delivery lists. To make a delivery, double-tap the item being delivered. The delivery detail property page will open. This screen has two tabs, one for general details and one for information about who the device was given to.
In order to edit the item click the Edit button. Once you have completed your changes click Save.
Completing a delivery on the PDA is no different to using the desktop client. Click on the Save button the General tab to save the record.
Collecting a Device
Note that at the top of the collection list you can select your name. This will then be used for all future collections.
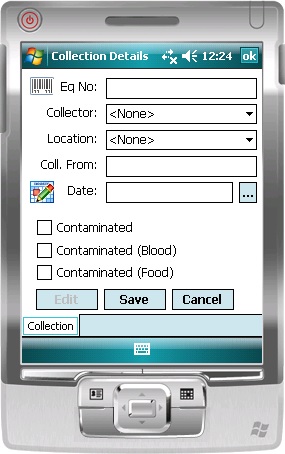
To make a new collection, on the Collections tab tap the Collect Item button. This will open the collection property page.
Completing the collection is no different to completing a collection using the desktop client.
Check-In
On returning to the library and docking the PDA in its cradle, checking your deliveries in will update the appropriate delivery lists and create loans as appropriate.
When checking in collections, a new collection list is created for all of the devices collected.
What’s Next
The next step is to add signature support to the application. We’ll get this added as soon as we can (assuming that people want it).
As always, any feedback will be welcome.
